
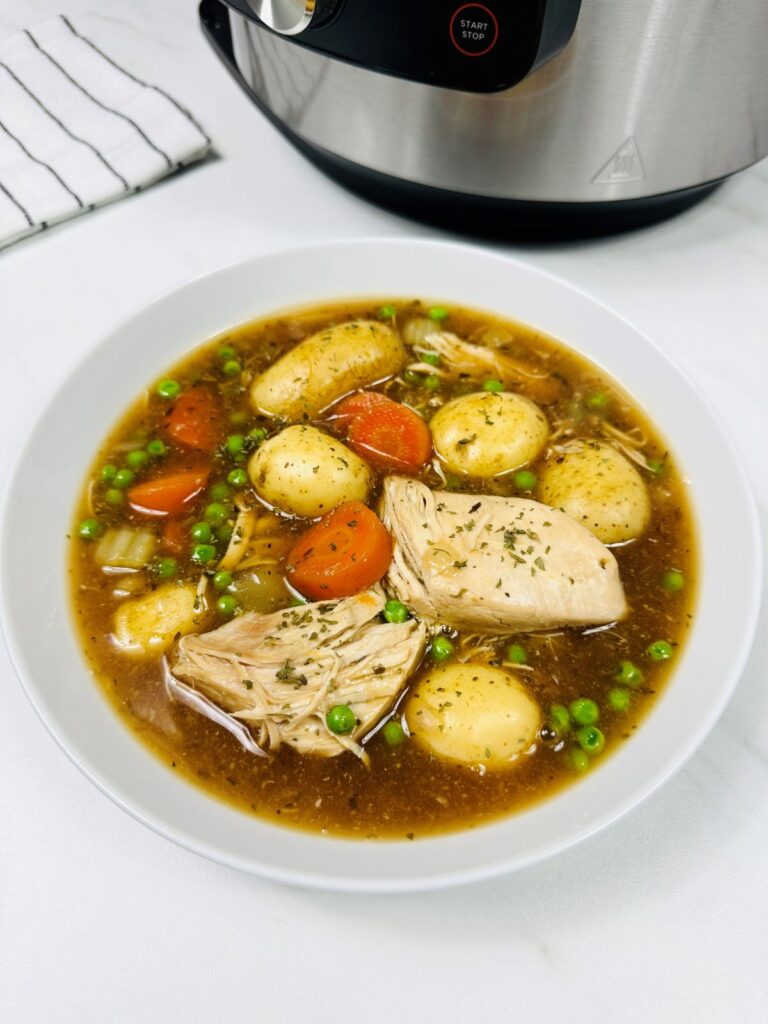
Making a chicken casserole in the Ninja Foodi is quick to prepare and tastes delicious. You can make a complete meal in one pot which can be ready in less than 45 minutes (using the pressure cooker function).
And once you set it off, you can go off and do something else, leaving the Foodi to do its thing.
It’s possible to convert pretty much any recipe and make it in a Ninja Foodi (or any multi-cooker). Recently we’ve been using the pressure cooker function on the Foodi for making lots of stews and casseroles, especially on those days when I forget to set the slow cooker off!
🛒 What You Need

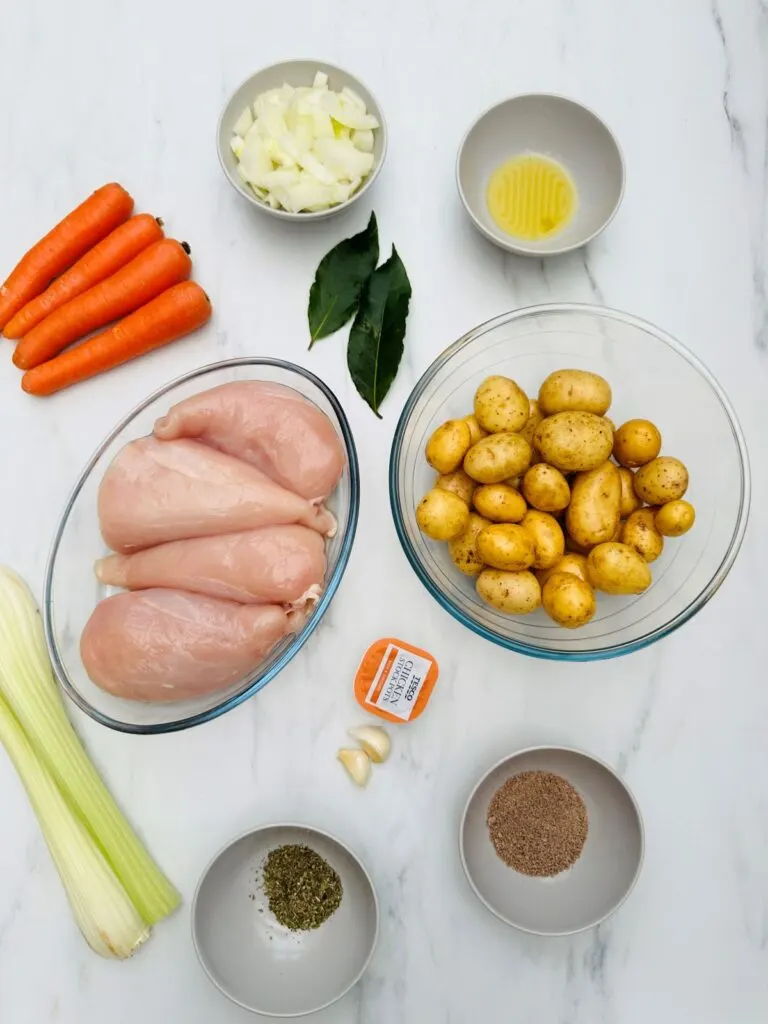
- Chicken – use either boneless chicken thighs, or chicken breast.
- Oil or butter – for sautéing the onions and garlic
- Onions and garlic
- Herbs – I used 2 tsp dried mixed herbs and 2 bay leaves
- Vegetables – use your favourite vegetables, or whatever is available. For this one I used carrots, new potatoes, celery and peas (the peas got added at the end).
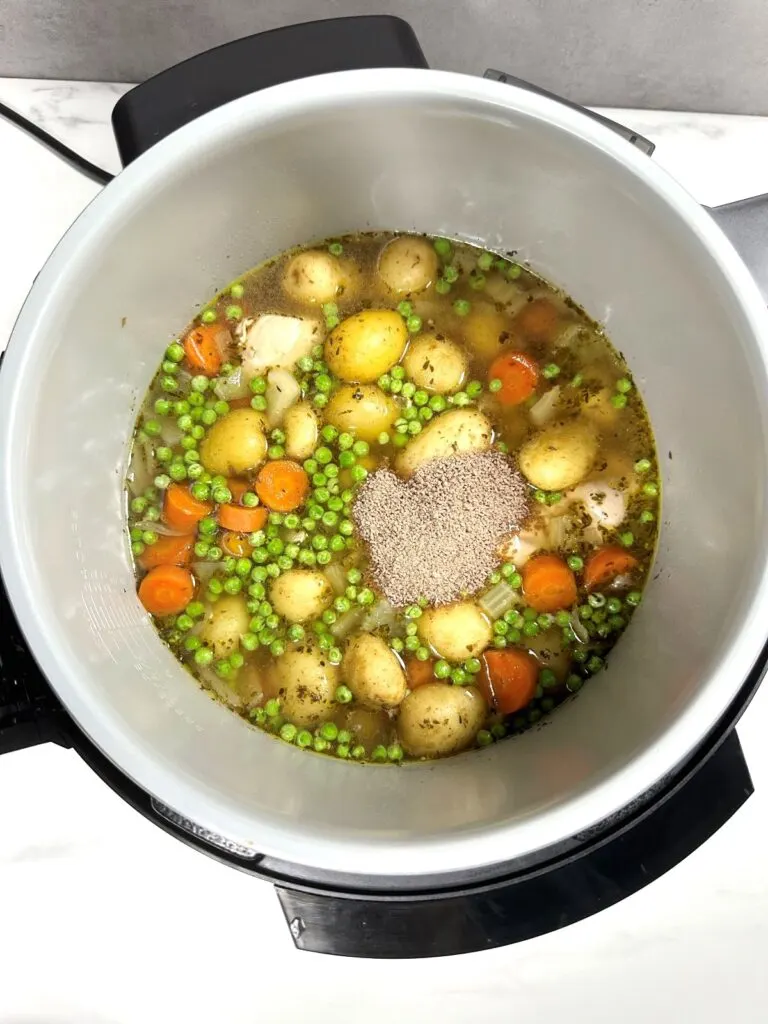
- Stock – make sure you use enough stock for your electric pressure cooker. I added 800ml of chicken stock. I prefer to add hot stock as it helps the Foodi to reach pressure sooner.
- Cornflour or chicken gravy granules – this is stirred in at the end to thicken up the casserole. I prefer to add a couple of tablespoons of gravy granules, but use what you prefer.
- Electric Pressure Cooker – I have made this recipe in the MAX 9-in-1 Foodi, 15-in-1 Ninja Foodi and an Instant Pot, but you can use any Ninja Foodi, or, other electric pressure cooker.
👩🍳 Cooking A Chicken Casserole In A Ninja Foodi – Step by Step
This recipe gives instructions for cooking a chicken casserole using the pressure cooker function. It can also be made using the slow cooker function on the Ninja Foodi, but follow my slow cooker chicken casserole recipe for that method.
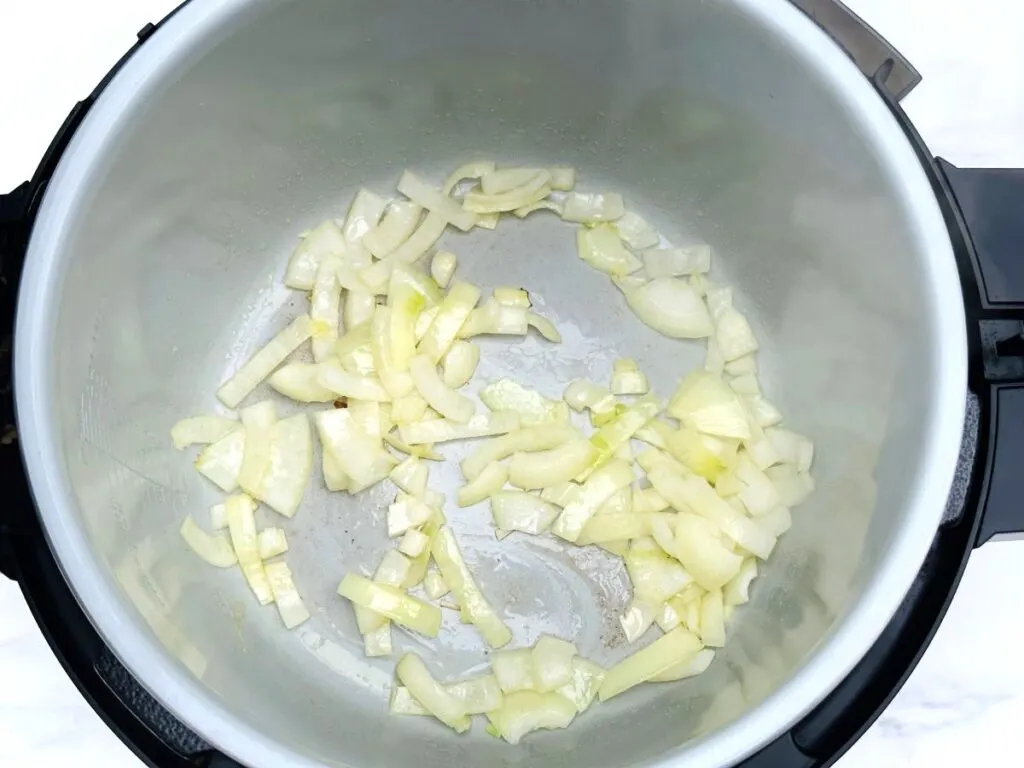
STEP 1
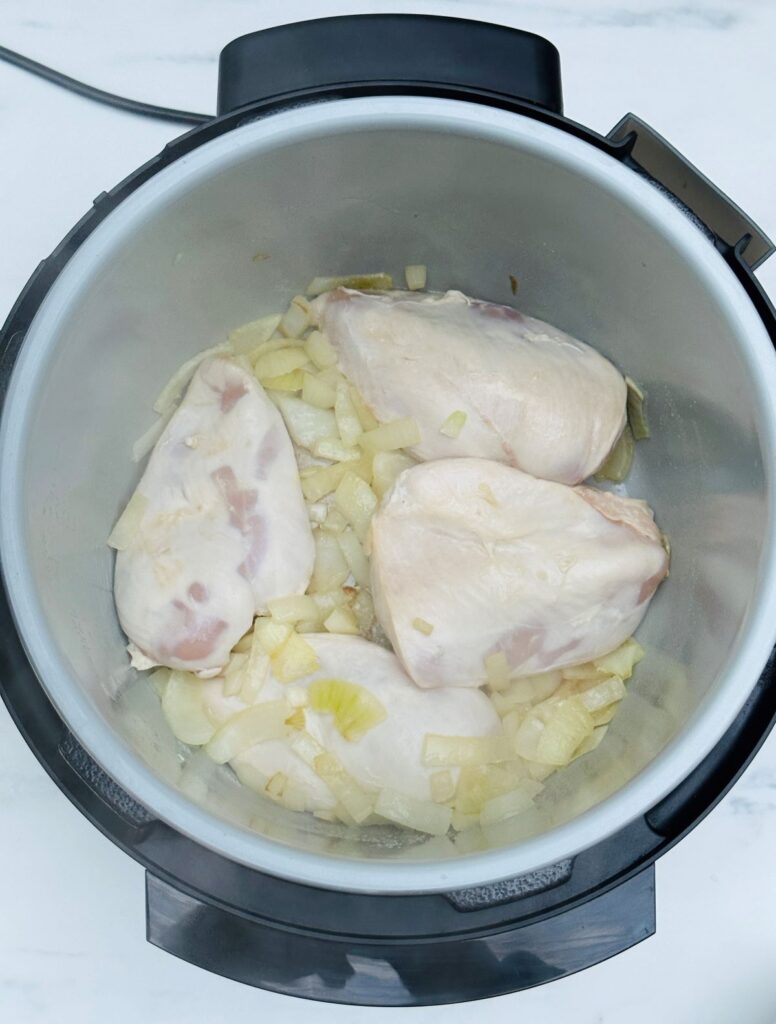
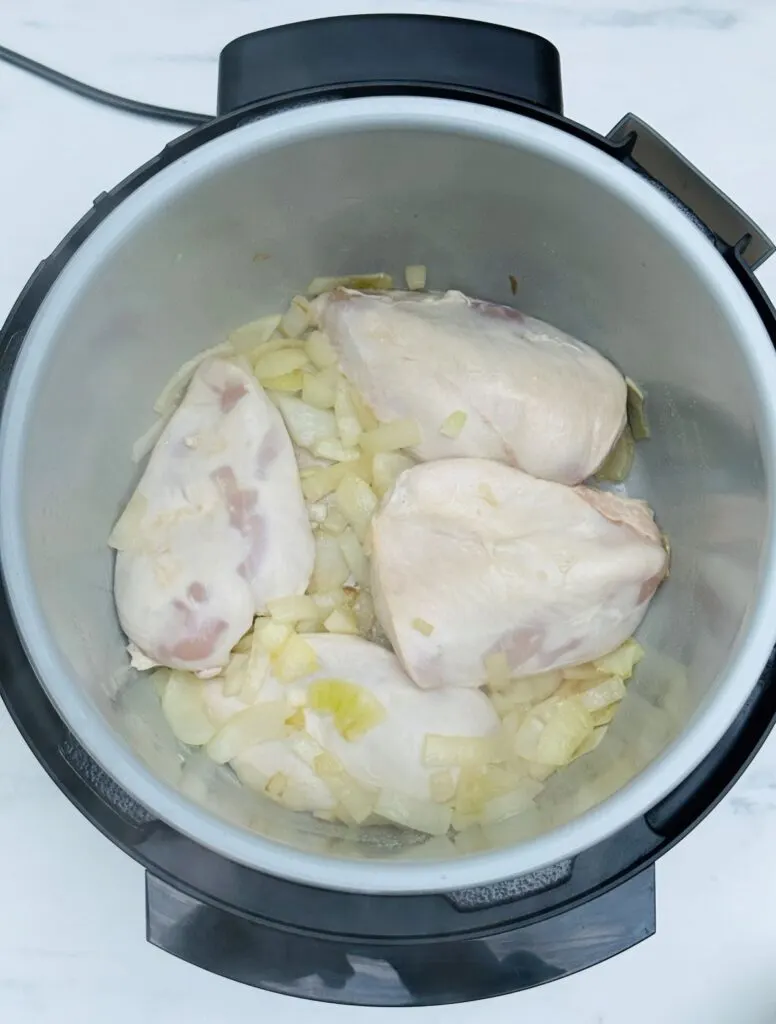
Add a little oil or butter to the Ninja Foodi bowl and switch on to ‘sear/sauté.’ Add the onions and gently cook for a few minutes, until they begin to soften up.

STEP 2
Keeping the sauté/sear function on, add the chicken. I like to keep the chicken whole and then break it apart at the end, I prefer the texture, plus it’s less preparation 😉
STEP 3
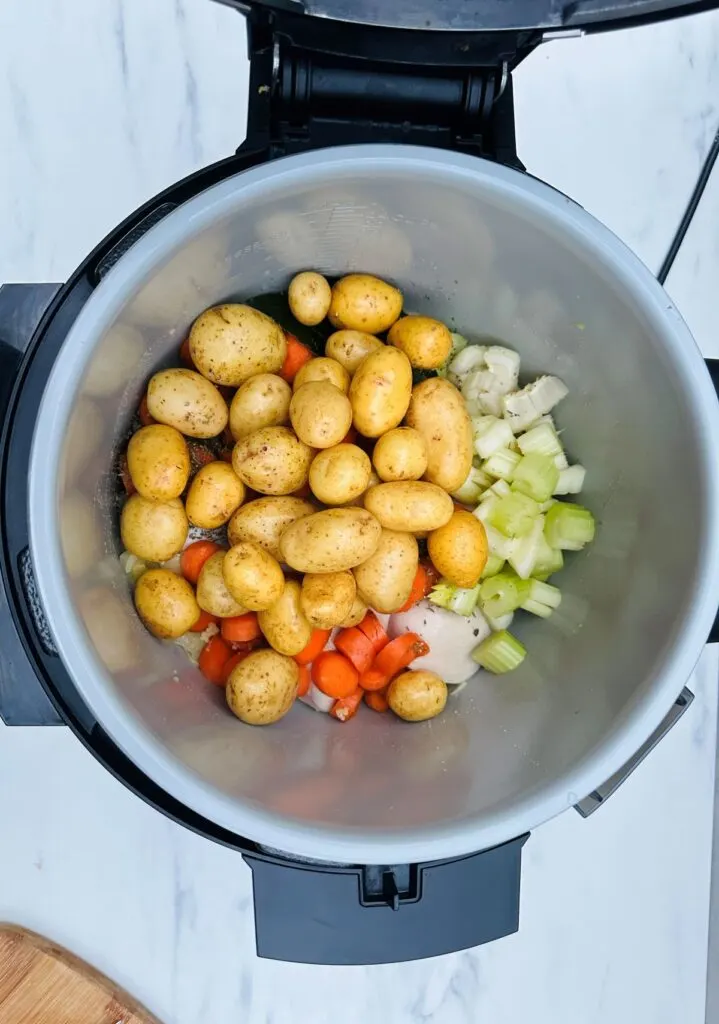
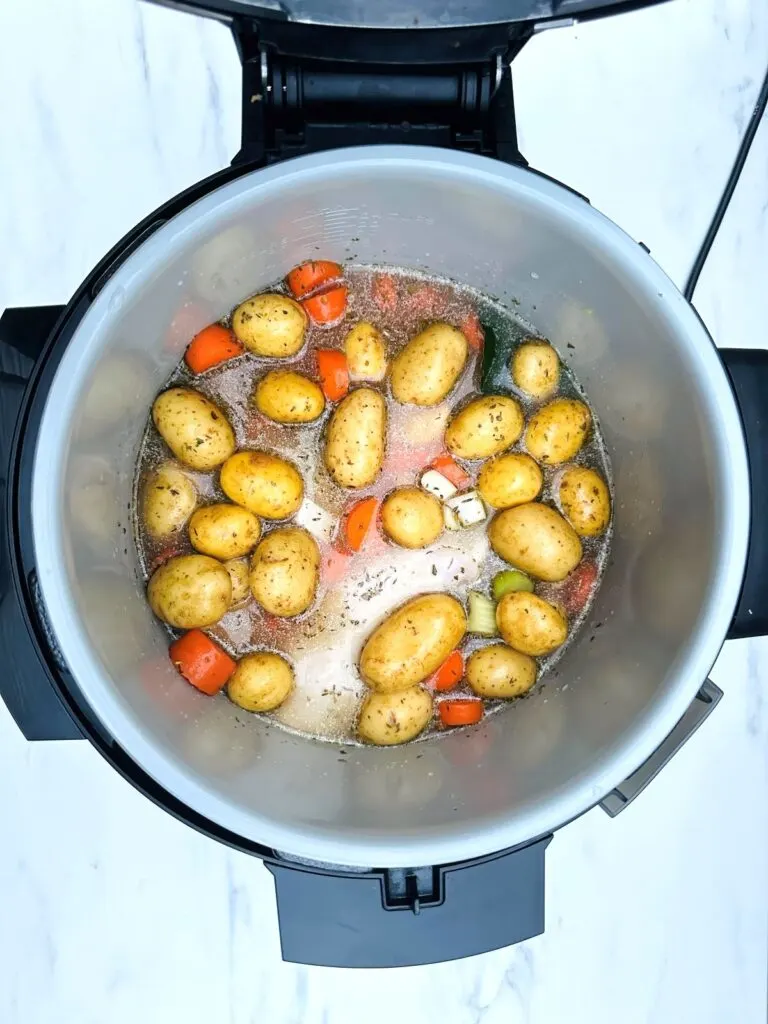
Switch the sauté/sear function off and add the remaining ingredients, apart from anything like broccoli, peas or cabbage.

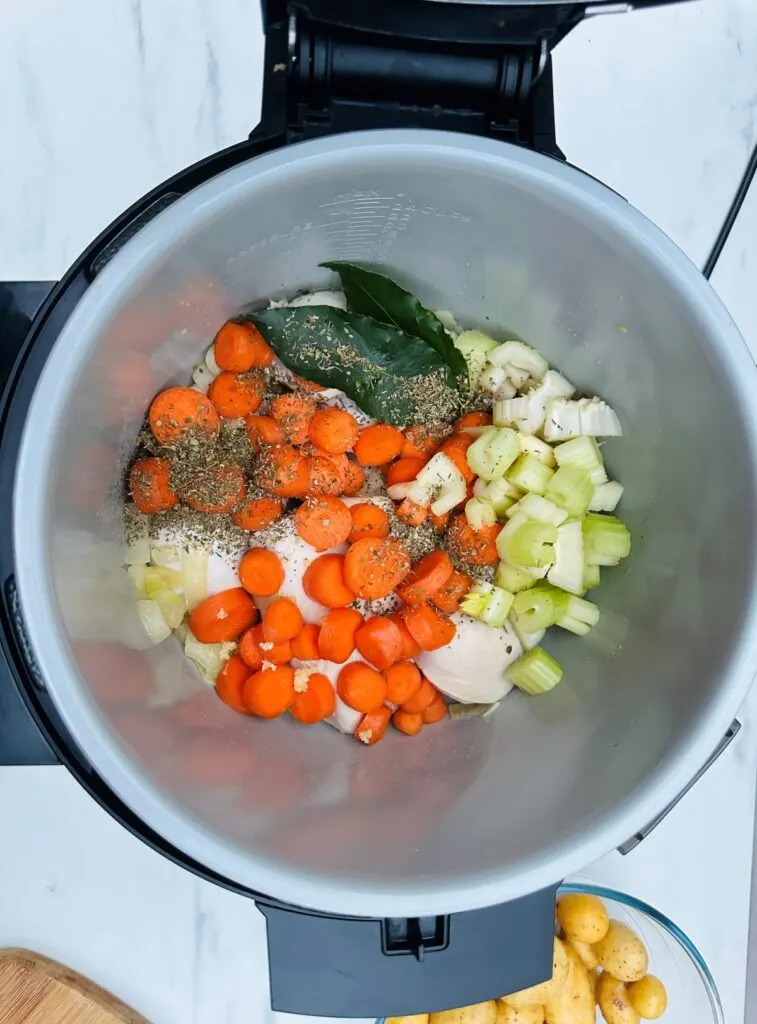
If you are including new potatoes, add these now.

STEP 4
Add the hot stock. I used 800ml of chicken stock, use enough to cover everything in the pressure cooker, while still not going over the maximum line.

STEP 5
Put the pressure cooker lid on and set the valve to ‘seal.’ Switch the function to pressure cooker and set it to high for 10 minutes.
It should take around 10 minutes to reach pressure (the silver bit in the valve will come up when it is at pressure and the timer will start).
Once the timer has finished, I tend to leave it for up to 10 minutes to naturally release before doing a quick release.
STEP 6
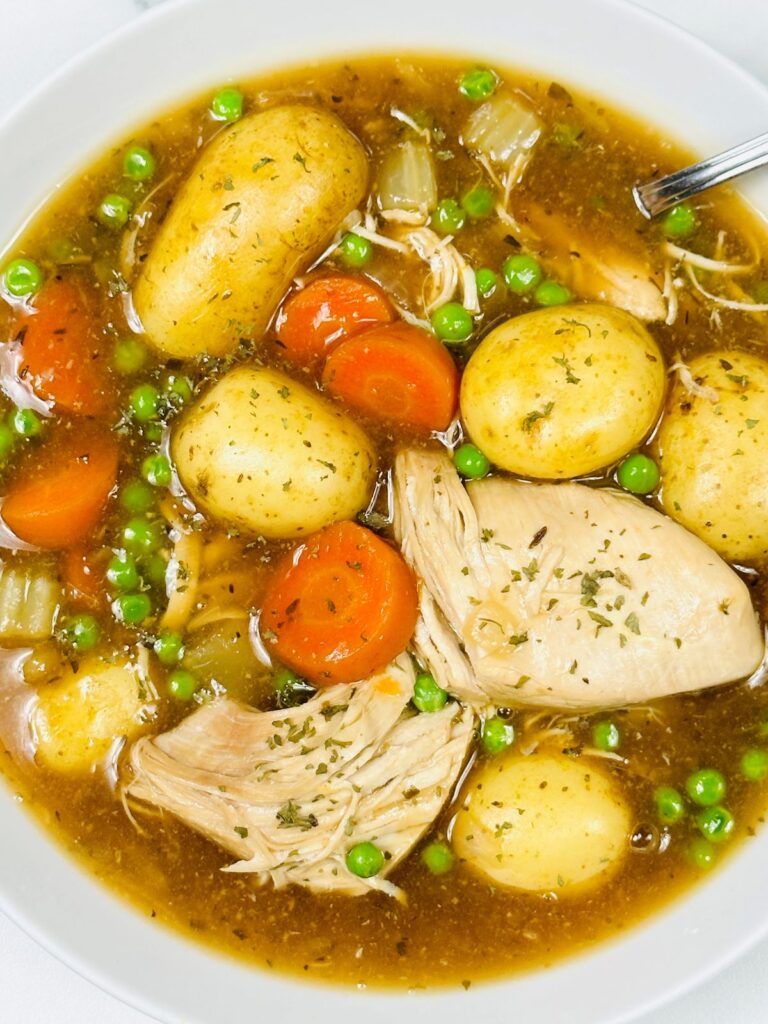
Remove the lid from the pressure cooker and gently pull the chicken apart into chunks. The chicken may shred a little and become more like pulled chicken. You can also remove the bay leaves at this stage.

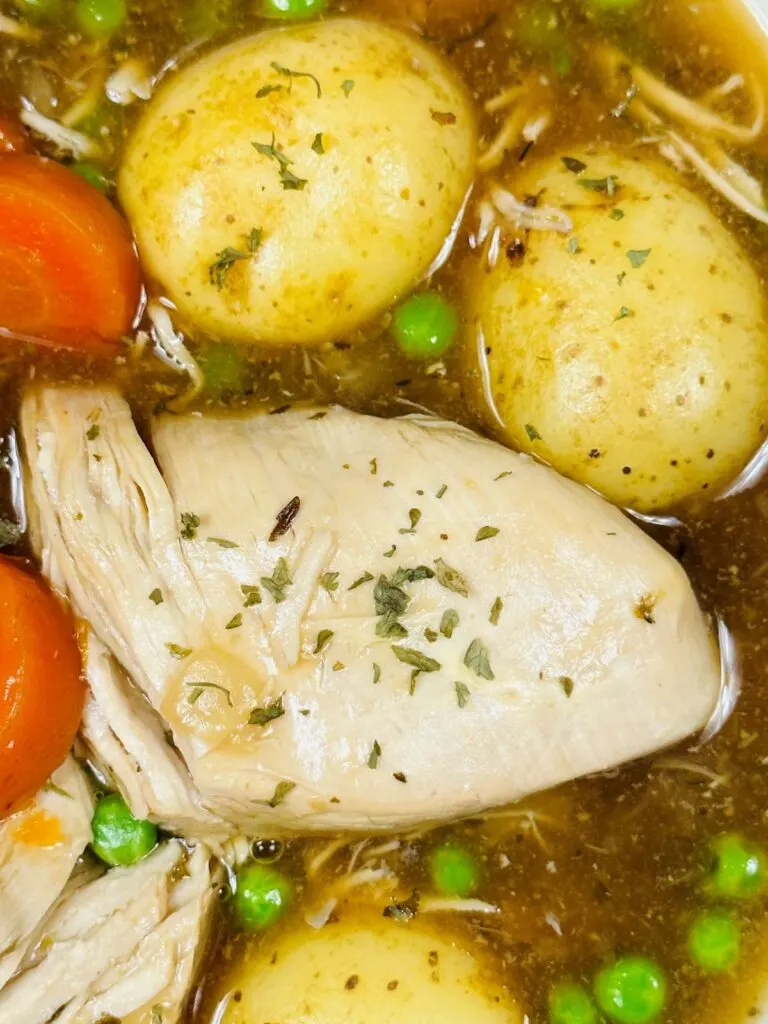
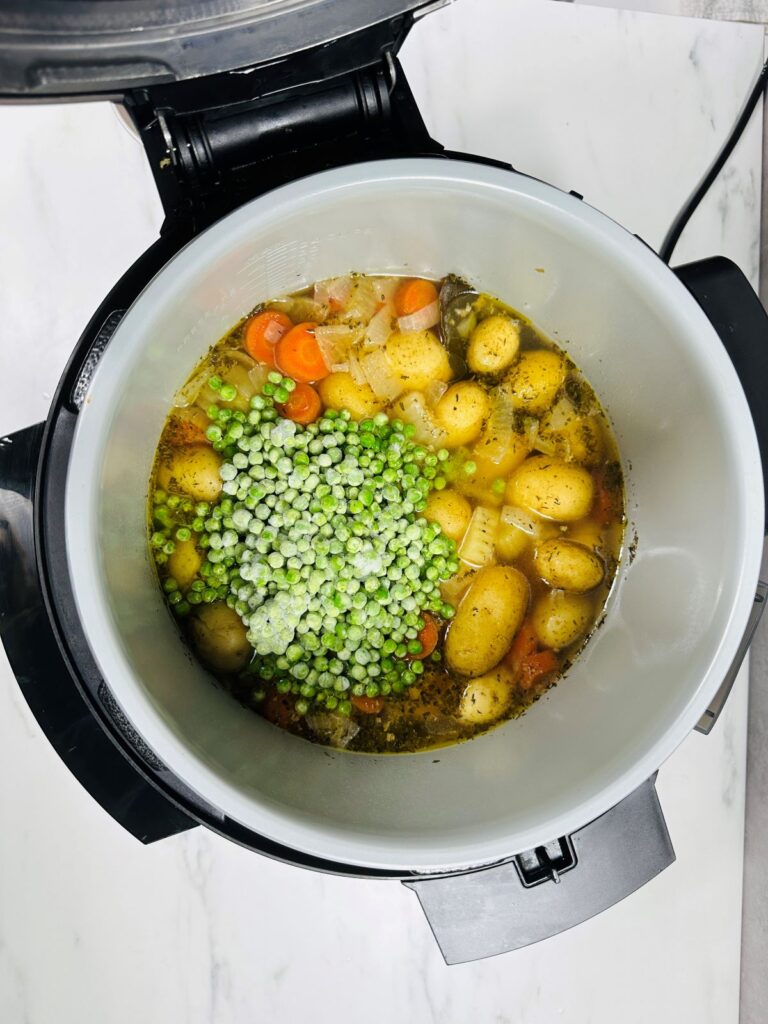
This is also when I add in any extra vegetables that I want to such as frozen peas, broccoli, cabbage. Switch the function on your multi cooker to the sear/sauté mode.
STEP 6
I also take this opportunity to add my choice of thickener, so for me, some chicken gravy granules. Just add 1 tablespoon at a time and stir until it is at your preferred consistency.

STEP 7
Give it a taste test and add any seasoning if needed. Serve and enjoy!

⭐ Ninja Foodi Chicken Casserole Tips
- Brown Your Chicken First: Use the ‘Sauté’ function to brown the chicken pieces before pressure cooking. This will add a depth of flavour to the casserole that you don’t get from pressure cooking alone.
- Deglaze the Pot: After browning the chicken, pour in a little stock or wine to deglaze the pot, using a wooden spoon to scrape up any tasty bits stuck to the bottom. This step adds flavour and prevents a ‘burn’ warning.
- Don’t Overfill: Be careful not to fill the Ninja Foodi more than two-thirds full, as recommended for pressure cooking.
- Seal Properly: Ensure the valve is set to ‘seal’ when you start the pressure cooking process.
- Liquid is Key: Make sure there is enough liquid in the casserole for the pressure cooker to work effectively. A minimum of around 250ml of liquid is generally recommended for the Ninja Foodi to be able to pressurise. I used 800ml of chicken stock so there was plenty of sauce to serve with the casserole.
- Timing is Everything: Pressure cookers cook much faster than conventional methods, but recipes will often require natural pressure release (NPR) for meats to remain tender. Make sure to account for this time when planning your meal.
- Thicken After Pressure Cooking: If you want a thicker sauce for your casserole, remove the cooked chicken and vegetables after pressure cooking, set the Foodi to ‘Sauté’, and simmer the sauce with a cornflour slurry (cornflour mixed with cold water) until it reaches your desired consistency. Alternatively, stir in some chicken gravy granules.
🧾 More Ninja Foodi Pressure Cooker Recipes
There are plenty of pressure cooker recipes you can make in a Ninja Foodi (or any other multi-cooker).
- Ninja Foodi Beef Stew
- Ninja Foodi Beef Brisket
- Ninja Foodi Gammon Joint
- Ninja Foodi Sausage Casserole
- Ninja Foodi Chilli Con Carne
- Ninja Foodi Pulled Pork
I hope you enjoy this Ninja Foodi Chicken Casserole recipe – let me know in the comments if you make it, and if you have any questions!
👉 Recipe Card (Concise Instructions + Print)


Ninja Foodi Chicken Casserole
Some of the links in this post may be affiliate links – which means if you buy the product I get a small commission (at no extra cost to you). If you do buy, then thank you! That’s what helps us to keep Liana’s Kitchen running.
Ingredients
- 1 tbsp olive oil
- 1 onion chopped
- 2 cloves garlic crushed
- 4 chicken breasts/boneless chicken thighs
- 2 tsp dried mixed herbs
- 2 bay leaves
- 4 medium carrots chopped
- 2 stalks of celery chopped
- 600 g new potatoes
- 300 g frozen peas or broccoli, cabbage etc
- 800 ml chicken or vegetable stock
- 2 -3 tbsp chicken gravy granules to thicken
Instructions
- Switch the Ninja Foodi on and select the 'sear/sauté' function. Add the oil (you can also use butter) and leave to heat before adding the chopped onions. Cook the onions for a few minutes, or until they are starting to soften.
- Leaving the sauté/sear function on, add the chicken breasts/thighs and quickly seal on each side.
- Switch the sauté/sear function off and add the remaining ingredients, apart from ingredients that don't take long to cook like peas, broccoli and cabbage.
- Place the pressure cooker lid on the Ninja Foodi and set the valve to 'seal'. Choose the pressure cooker function and set it to high, 10 minutes. The Ninja Foodi should take about 10 minutes to come to pressure.
- At the end of the 10 minutes cooking time, leave the Ninja Foodi for about 10 minutes to release naturally before doing a quick release.
- Remove the lid and switch the function to sear/sauté again. Stir in any green vegetables (peas, broccoli etc). Also, add in your thickener of choice; either cornflour or chicken gravy granules and stir. Leave to simmer for about 3 to 5 minutes, or until any green vegetables have cooked through.
- If you have not already included potatoes in the pot, serve with rice or mashed potatoes.
Video
Notes
- Add the peas at the end or they will end up overcooked. The same applies to other green vegetables such as broccoli and cabbage.
- Instead of using gravy granules to thicken the casserole at the end, you can use cornflour instead.
Nutrition
Nutrition information is automatically calculated, so should only be used as an estimate.
Rachael
Thursday 23rd of April 2026
Looking forward to trying this. The only really off putting thing about this recipe is the word ‘slurry’. It’s what comes out of a pig farm, and really, is best not used anywhere in conjunction with a recipe. Just replace it with good old ‘cornflour and water mix’ perhaps?
Debbie
Wednesday 29th of October 2025
I'm cooking this tonight. I have to say, I've cooked several recipes here and cannot complain. They have all been delicious. I'm adding leeks and maybe some mushrooms aswell as the carrot and celery. Crusty bread rolls too (shop bought as no time to make beforehand). Homemade bread in ninja is perfect too btw 👌 😋
Sue
Wednesday 27th of March 2024
Hi just a quick question. If you double the quantities,do you need to pressure cook for longer? I have made this loads of times and it is delicious but need to feed more people
Robert Goodwin
Sunday 5th of November 2023
All been a great help so far
Diana Wiltshire
Saturday 4th of November 2023
My ninja foodi doesn't have either a saute/sear or pressure cooker function. Only bought in July.
Liana Green
Wednesday 20th of December 2023
Hi Diana - do you have the air fryer?